I’ve remained committed to improving my powershell game. Reaching for it instead of shoddy bat files whenever possible. There’s a bunch of things that didn’t make it into the first post, including a few things that inadvertantly got left out (e.g. copying files, other loops, etc.). So, I updated that post so it covers basic syntax and core command-line functionality. This post covers mostly auxillary features and utility commands.
time/wc
# time; measure duration of command
Measure-Command { make }
# ls -1; count files in directory
Get-ChildItem | Measure-Object
# wc; count number of lines in file
Get-Content ./Cargo.toml | Measure-Object -Line
https://devblogs.microsoft.com/scripting/maximizing-the-power-of-here-string-in-powershell-for-configuration-data/
&&
PowerShell is nice and all, but one of the things I missed most from bash et al. is the ability to chain commands on success/failure like make clean && make.
Thanks to PowerShell Core being open-source, pwsh joins the party as of 7.0.0-preview.5 so you can do things like:
# Create directory and enter it
New-Item -Type Directory blah && Set-Location blah
If you’re using Windows Terminal, preview 1910 (or newer) should auto-detect it. For older releases, V > Settings (or Ctrl+,) to open profiles.json:
{
    "...": "...",
    "profiles" :
    [
        {
            "...": "...",
            "commandline" : "C:\\Program Files\\PowerShell\\7-preview\\pwsh.exe",
            "name" : "PowerShell Core",
            "...": "...",
        },
    ]
}
Setting the default shell:
Set defaultProfile to the guid of the desired shell (it was a bit different before 0.11):
{
  "...": "...",
  "defaultProfile": "{574e775e-4f2a-5b96-ac1e-a2962a402336}",

  "profiles": [
    {
      "commandline": "C:\\Program Files\\PowerShell\\7\\pwsh.exe",
      "guid": "{574e775e-4f2a-5b96-ac1e-a2962a402336}",
      "name": "PowerShell Core",
      "startingDirectory": "%USERPROFILE%",
      "...": "..."
    },
  ],
}
For Visual Studio Code, View > Command Palette (Ctrl+Shift+P) and type select default shell. It should present a drop-down list of options including the version you just installed. You may need to restart VS Code to change the current shell.
Opening a new terminal should now display:
PowerShell 7.0.0-preview.5
Copyright (c) Microsoft Corporation. All rights reserved.
Filtering, substrings, grep, awk
When looking for substrings, make sure you use -like not -contains (which is for collections). Contrast:
$string = "windows-2019"
$string -contains '*2019*' # False
$string -contains '2019' # False
$string -like '*2019*' # True
$string -like '2019' # False
$string.Contains('*2019*') # False
$string.Contains('2019') # True
# Get first item of output
Get-ChildItem | select -First 1
Get-ChildItem | Select-Object -First 1
# Get certain properties of output
(Get-ChildItem).FullName
Get-ChildItem | % { $_.FullName }
Get-ChildItem | Select-Object -ExpandProperty FullName

# grep; find text in files
Select-String -Path ./src/*.rs -Pattern 'let'
# Find text in output
(Get-ChildItem).FullName | Select-String Cargo.*

# Split a string
$x = "0 1 2 3"
-split $x
# Split using explicit delimiter
"0,1,2,3" -split ','
# Split and return specific items
(-split $x)[0,-1] # 0 3
(-split $x)[-2..-1] # 2 3
(-split $x)[0,1+2..3] # all
(-split $x)[2..3+0] # 2 3 0
# WARNING: The following DON'T work
(-split $x)[0+2..3]
(-split $x)[0,2..3]
(-split $x)[2..3,0]
Formatting
# Output certain columns
Get-ChildItem | Format-Table Name, Size
"{1} {0}" -f "A", "B" # B A
"{0:X8}" -f 42 # 0000002A
[String]::Format("{0:x8}", 42) # 0000002a

# Convert to json
Get-ChildItem | Format-Table Name, Size | ConvertTo-Json
# Parse json file and get "tasks" field
(Get-Content ./.vscode/tasks.json | ConvertFrom-Json).tasks
# Parse key-value pairs as hashtable
'{ "key":"value1", "Key":"value2" }' | ConvertFrom-Json -AsHashtable
Aliases/which/whereis
# List all aliases
alias
Get-Alias
# Get alias for `Get-Command`
Get-Alias -Definition Get-Command
# Get aliases matching `gc*`
Get-Alias gc*
Get-Alias -Name gc*
which and whereis from this SO:
# All "gcc*" commands
Get-Command gcc*
# As a nicer table
Get-Command gcc* | Format-Table Name, Path
# Full path to first `cargo`
Get-Command cargo | Select-Object -First 1 -ExpandProperty Path
# Execute it
& $(Get-Command cargo | Select-Object -First 1 -ExpandProperty Path)
Profiles
Profiles are scripts that run when PowerShell starts (like .bashrc etc.). $profile is the current profile:
| Win10 | $home\Documents\PowerShell\Microsoft.PowerShell_profile.ps1 |
| Linux/MacOS | $home/.config/powershell/Microsoft.PowerShell_profile.ps1 |
This is where you can set Set-PSReadLineOption and other environment/session customizations.
More Loops
Get-Alias -Definition "*ForEach*"

CommandType     Name                                               Version    Source
-----------     ----                                               -------    ------
Alias           % -> ForEach-Object
Alias           foreach -> ForEach-Object
Repeat something X times:
0..10 | % {
    # Commands to repeat here
}
Archives
# Extract to bundle/
Expand-Archive bundle.zip
# Extract to path
Expand-Archive bundle.zip .
Expand-Archive bundle.zip -DestinationPath .
# Extract multiple files
Get-ChildItem $Home/Downloads -Filter *.zip | Expand-Archive -DestinationPath output/ -Force
If you’ve got something that’s not a zip, perhaps a series of 7zip .7z.001, .002, etc. (from this SO):
& $env:ProgramFiles\7-Zip\7z.exe x .\Downloads\*.7z.* "-o.\Downloads" -y
curl/wget
This blog covers options for downloading files. While BITS via Start-BitsTransfer is a great option for Windows, Invoke-WebRequest works best for multi-platform scripts:
# wget; Http GET
Invoke-WebRequest https://sh.rustup.rs -OutFile rustup-init.sh
- Invoke-WebRequest
- Invoke-RestMethod; general REST operations
Visual Studio
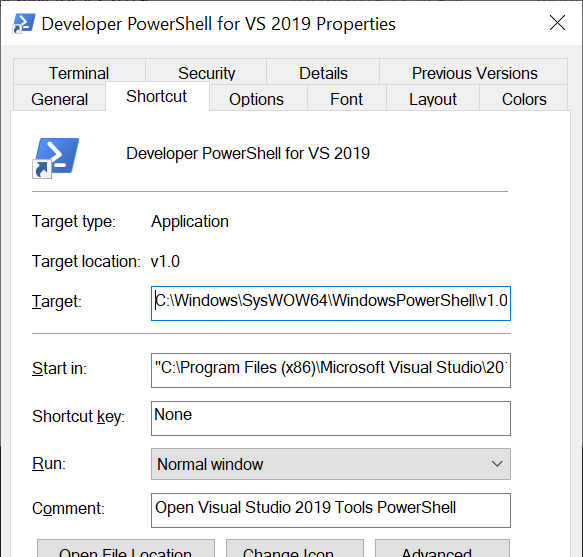
If you use Visual Studio you’re familiar with the “developer command prompt”- a cmd shell to use VS executables from the command line. A recent VS 2019 update came with “Developer PowerShell for VS 2019”:
After launching powershell it initializes the environment with:
Import-Module "C:\Program Files (x86)\Microsoft Visual Studio\2019\Community\Common7\Tools\Microsoft.VisualStudio.DevShell.dll"
Enter-VsDevShell 20a49f0c
Let’s take a look at Enter-VsDevShell:
PS> Get-Help Enter-VsDevShell

NAME
    Enter-VsDevShell

SYNTAX
    Enter-VsDevShell -VsInstallPath <string> [-SkipExistingEnvironmentVariables] [-StartInPath <string>] [-DevCmdArguments <string>] [-DevCmdDebugLevel {None | Basic | Detailed       | Trace}] [-SkipAutomaticLocation] [-SetDefaultWindowTitle] [<CommonParameters>]

    Enter-VsDevShell [-VsInstanceId] <string> [-SkipExistingEnvironmentVariables] [-StartInPath <string>] [-DevCmdArguments <string>] [-DevCmdDebugLevel {None | Basic | Detailed      | Trace}] [-SkipAutomaticLocation] [-SetDefaultWindowTitle] [<CommonParameters>]

    Enter-VsDevShell [-Test] [-DevCmdDebugLevel {None | Basic | Detailed | Trace}] [<CommonParameters>]
For example, to get a powershell instance for VS 2019 Community edition:
$vspath = "C:\Program Files (x86)\Microsoft Visual Studio\2019\Community\"
Import-Module "$vspath\Common7\Tools\Microsoft.VisualStudio.DevShell.dll"
Enter-VsDevShell -VsInstallPath $vspath